


How to Use a Laser Level for Kitchen Cabinets

Upper cabinets usually look fine during installation. It is weeks later, when you load the shelves and step back, that you notice something is off. By then the screws are set, the drywall is patched, and your options are limited.
A laser level prevents this, but most people use it wrong. They project the horizontal line, align the cabinets to it, call it close enough, and drive the screws. Close enough in cabinet installation has a habit of becoming very expensive.
Base cabinets and upper cabinets follow different logic. They use different laser lines in different positions, and the sequence matters. This guide covers both workflows, including the upper cabinet steps that most installation tutorials skip entirely.
What You Need to Install Kitchen Cabinets with a Laser Level
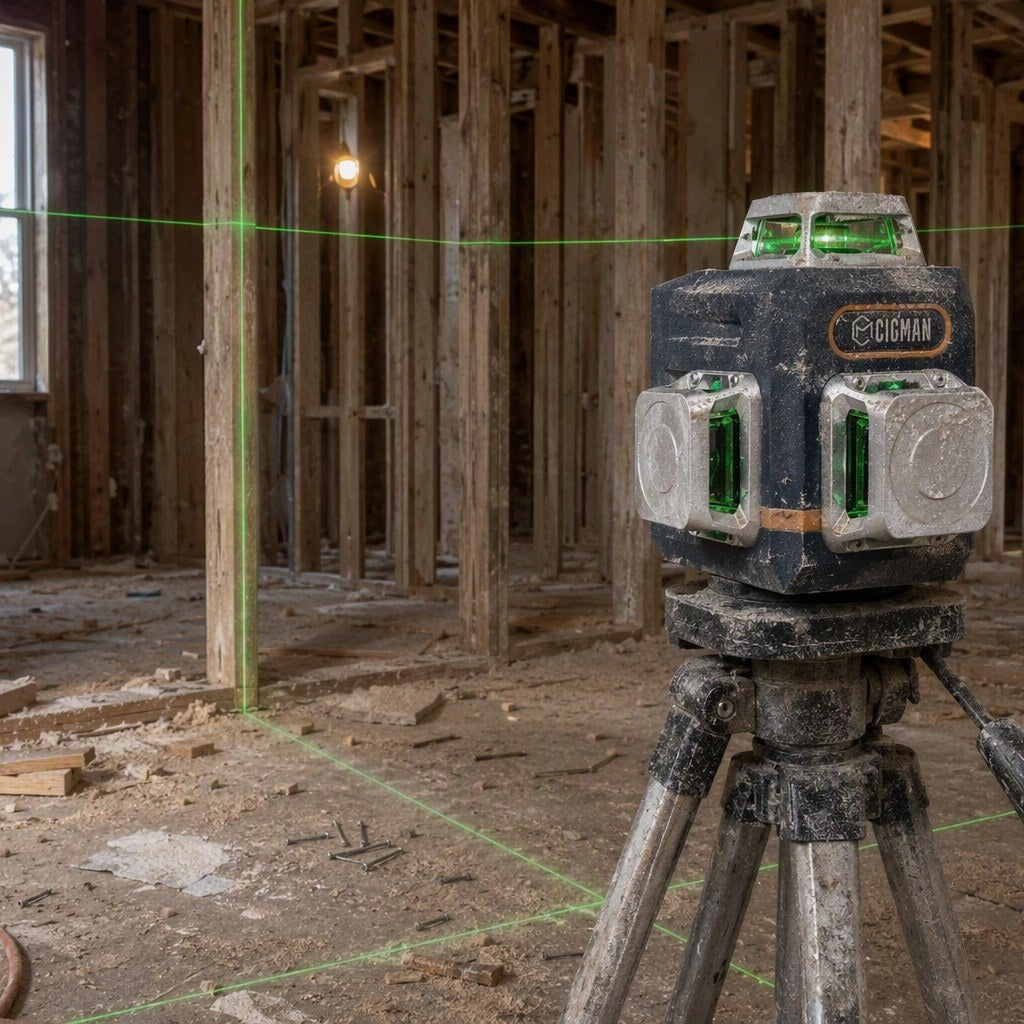
Skip the rotary laser, that is a tool for grading outdoor slabs, not kitchen cabinets. What you need is a cross-line laser level: one horizontal line, one vertical line, self-leveling. The CIGMAN CM-701 runs three 360° lines (1H + 2V), which covers every step in this guide with one setup.
- Cross-line laser level (minimum 1H + 1V, self-leveling)
- Tripod or wall-mount bracket
- Wood shims (a pack from the hardware store, a few dollars)
- One straight 1×4 board, long enough to span the upper cabinet wall
- Pencil, tape measure
- Drill, spirit level
- Stud finder
The two lines do different jobs. The horizontal line establishes height, it tells you whether surfaces are at the same level. The vertical line checks plumb, it tells you whether a cabinet face is leaning forward or backward. Base cabinets only need the horizontal line. Upper cabinets need both, in sequence.
One thing worth knowing before you start: if the laser level tilts more than ±4° off level, the lines lock out and the indicator light flashes. This is not a malfunction, it is the self-leveling mechanism protecting accuracy. Set the tool back on a flat surface or adjust the tripod, and the lines come back on. Cabinet installation involves moving the laser frequently, so this will happen.
Install Wall Cabinets Before Base Cabinets
Most people install base cabinets first. Professional installers do it the other way around.
When upper cabinets go in first, the floor is clear. You can move freely, lift boxes without obstruction, and there is nothing below to scratch or dent. Install base cabinets first, and every upper cabinet goes up while you are hunched over the countertop height, working in a tighter space with less room for error.
The sequence here: use the laser level to mark the base cabinet reference line on the wall now, but leave the base cabinets unfixed. Install all the upper cabinets first, then come back and lock the base cabinets into position.
How to Level Base Cabinets with a Laser Level
The starting point for base cabinet layout is not measuring up 34½ inches from the floor. It is finding the highest point on the floor.
Kitchen floors look flat. They rarely are. Base cabinets can only go up, you can shim them higher, but you cannot press them lower. If you set your reference line at a point below the floor's high spot, the cabinet at that high spot will be proud of the line with no way to correct it. Start from the high point, and every other cabinet gets shimmed up to meet it.
- Push the base cabinets into their approximate positions. Do not fix them yet.
- Mount the laser level on a tripod and project the horizontal line roughly at cabinet top height. The green beam sweeps continuously across all cabinet tops.
- Walk along the run and look for any cabinet top that sits above the laser line. That cabinet is the high point. Cabinets whose tops fall below the line will need shims to reach it.
- Lower the laser line until it just grazes the top of the highest cabinet. Use the remote control to adjust height without touching the instrument, the line stays stable.
- Trace the laser line along the wall with a pencil from end to end. This pencil line is your reference for the rest of the installation.


Once the pencil line is on the wall, move the laser level out of the way. The line does not need to stay active, the pencil mark holds the reference. Do not fix the base cabinets yet. Go install the upper cabinets first.
How to Install Wall Cabinets Alone with a Ledger Board
Installing upper cabinets solo is a problem of hands. Holding the box against the wall, keeping it at the right height, and driving screws all at the same time takes three hands. A ledger board solves this.

A ledger board is a straight length of 1×4 lumber temporarily screwed to the wall studs at the upper cabinet height line. The cabinet rests on it. You let go. Both hands are free to fasten, clamp, and adjust.
- Use the stud finder to locate wall studs along the upper cabinet run. Mark each stud position.
- Position the 1×4 board at the 54-inch height line and screw it into the studs. Drive at least two screws into different studs so it holds firm under the cabinet weight.
- Project the horizontal laser line onto the board's top edge. If the board is level, the green line rides along the full length of the top edge. If one end is high or low, the laser line pulls away from the edge, visible immediately. Shim the low end until the line sits flush, then tighten the screws.
- Rest the bottom edge of each upper cabinet on the board. The cabinet stands on its own. Use the freed hands to drive screws, check plumb, and clamp adjacent boxes together.
- Once all upper cabinets are installed, remove the ledger board and fill the screw holes.
The CM-701 includes a magnetic L-bracket that attaches directly to steel framing or steel hardware, useful when there is no room for a full tripod between cabinets. The magnetic mount only works on ferromagnetic metal. If your wall brackets are aluminum, or you are mounting to drywall or wood, use a screw mount or a tripod instead.
Aligning Upper Cabinets with a Laser Level
The height reference is already on the wall, the ledger board sits at 54 inches. Now use the vertical line to check each cabinet for plumb before the screws go in.
Start at the corner and work outward. Every cabinet in the run aligns to the one before it. If the first cabinet is off, the error compounds down the entire wall.
Before hanging the first cabinet, scan the wall surface with the vertical laser line. Find the most protruding point on the wall, that is your reference plane. Any low spots behind future cabinet backs need shims to bring the cabinet back out to that plane. Do not let an uneven wall push cabinet faces out of plumb.

- Rest the cabinet bottom on the ledger board and push it into position.
- Project the vertical laser line onto the center of the cabinet face. When the line runs parallel to the face panel, the cabinet is plumb. When the line forms a visible angle with the panel, wider at the top, narrower at the bottom, or the reverse, the cabinet is leaning.
- If the wall surface is pushing the cabinet out of plumb, place shims between the cabinet back and the wall until the vertical line reads parallel. Do not force the cabinet flush by overtightening screws, a forced cabinet will have doors that will not close properly over time.
- Clamp adjacent cabinet frames together at the face, align the front edges, and drive screws through the frames to join them.
- Drive at least two 3-inch screws into studs to fix the cabinet to the wall.
When all upper cabinets are hung, switch back to the horizontal line and run it along the bottom edges of the entire run. The green line should graze every cabinet bottom evenly. Any cabinet bottom sitting above or below the line means that section of ledger board was not perfectly level, catch it now before the screws are fully tight. Once the check passes, remove the ledger board.
One thing to expect: the vertical laser line will confirm the cabinet is plumb, but the wall behind it may not be. A gap between a plumb cabinet and a non-plumb wall is the wall's problem, not yours. Fill visible gaps with scribe molding or caulk. Do not twist the cabinet to close the gap.
Shimming Base Cabinets Level
Upper cabinets are done. Come back to the base cabinets.

Shim each cabinet at all four corners individually. Do not shim only at the center or only under the front two feet. The floor height at each corner of the same cabinet can differ. A cabinet shimmed at one point and left floating at the other three is under stress, the countertop will eventually show it, and doors will stop closing cleanly.
- Set the laser level back up and align the horizontal line to the pencil mark on the wall. The green beam should trace along the pencil line, that is your target height.
- For each cabinet, measure from the top surface up to the laser line. That measurement is how much shim you need at each corner.
- Shim each corner independently until the cabinet top meets the laser line. Watch the relationship between the laser line and the cabinet top from the side, when the line grazes the surface, that corner is at height.
- Confirm with a spirit level across the cabinet top, front-to-back and side-to-side.
- Drive screws into the studs to fix the cabinet. Run the laser line again after tightening, screw pressure sometimes pulls the cabinet down a small amount.
When the full base cabinet run is fixed, join adjacent cabinet frames at the face and connect them with screws. Run the horizontal laser line one final time across all cabinet tops. Every top surface should track the green line evenly with no steps between boxes.
Laser Level Safety for Cabinet Installation
Green laser beams reflect off polished metal surfaces unpredictably. Cabinet tops during installation often hold aluminum spirit levels, metal rulers, or steel squares. Switch the laser on with those tools in place and the beam can bounce directly toward your eyes.
Which CIGMAN Laser Level for Kitchen Cabinet Installation
CM-701
CM-701 is $149.99. Three 360° lines (1H + 2V), 100ft indoor range, self-leveling to ±4°, remote control, USB-C rechargeable, IP54 rated, magnetic L-bracket included. The three lines cover the full base and upper cabinet workflow in a single kitchen without repositioning. For a standard single-kitchen DIY installation, the CM-701 is enough.
CM-S04
CM-S04 is $209.99. 16 lines (4×360°), LCD display, Bluetooth app and remote control, two USB-C batteries at 6.5 hours each, 5-year warranty, hard case included. The additional lines reduce how often you need to move the tool when working across a large kitchen or multiple rooms simultaneously. For a standard kitchen, the CM-701's three lines are sufficient, the CM-S04 makes more sense for larger projects.

CIGMAN CM-701 3x360° Laser Level
- 3x360° green beam (1H + 2V), 100ft range.
- Self-leveling ±4°, accuracy ±3mm/10m.
- Remote control, USB-C rechargeable.
Frequently Asked Questions
Do I need a self-leveling laser level for cabinet installation?
Yes. A manually-leveled laser requires recalibration every time you move it. Cabinet installation involves frequent repositioning. Self-leveling within ±4° means you set the tool down and it is ready, no bubble-tube adjustment each time.
Can a 2-line laser level work for kitchen cabinets?
For base cabinets, yes. For upper cabinets, it depends on the configuration. A 1H + 1V setup handles both base and upper cabinet work, the horizontal line sets height, the vertical line checks plumb. Two horizontal lines (2H) will not let you check the upper cabinet plumb; you would fall back to a spirit level for that step.
Can one person install upper cabinets?
Yes, with a ledger board. Without it, holding the cabinet at height while driving screws is not feasible for one person. The ledger board method is covered in the section above.
How much range does a laser level need in a kitchen?
A typical kitchen runs 10 to 20 feet. The CM-701 reaches 100 feet indoors, range will never be the constraint.
References
- CIGMAN CM-701 Laser Level, cigman.com. [Online]. Available: cigman.com/products/cm-701-laser-level
- CIGMAN CM-S04 Laser Level, cigman.com. [Online]. Available: cigman.com/products/cm-s04-16-lines-laser-level-with-lcd-display
- Laser level safety discussion, Reddit r/DIY. [Online]. Available: reddit.com/r/laserlevel



Commenta
Questo sito è protetto da hCaptcha e applica le Norme sulla privacy e i Termini di servizio di hCaptcha.